
Step-by-Step Instructions for Ordering Window Grilles

To simplify the ordering process for custom window grilles, please provide some essential details. Refer to this step-by-step guide for all the necessary information required when placing an order for window grilles from Fixhome.
Step 1 - Measure Your Window
Measure your window’s visible glass (aka daylight opening)—width first, then height. Input these dimensions on the ordering page.
See “How to Measure Your Window” for more details.
Step 2 - Select a Grille Type
We offer seven grille types to choose from. The type you select will prompt you to choose from a specific list of grille bars, surround profiles, and fasteners, including:
- Premium Colonial Pattern (Non-Surround) (X1-Pine & X2-Pine Profiles Only)
- Colonial Pattern (Full & Non-Surround) (Standard & Low Profiles)
- Prairie Pattern (Full & Non-Surround) (Standard & Low Profiles)
- Diamond Pattern (Full & Non-Surround) (Specific Standard Profiles)
- Top Row Pattern (Non-Surround Only) (Standard Profile Only)
- Radius Top (Non-Surround Only) (L & N-Pine Only)
- Sash Dividers (Standard, Low Profile Wood, Low Profile Vinyl, & Premium Profiles)
Step 3 - Select a Bar Profile
Fixhome offers three types of bar profiles: standard profile, low profile, and premium bar profile. Make your selection on the ordering page.
- Standard Profile – Typically used in wood windows for which slide-by clearance isn’t an issue.
- Low Profile – Typically used in double-hung windows and vinyl sliders for which slide-by clearance could present an issue.
- Premium Bar Profile – A double-sided profile similar to the Marvin Bar profile.
See "Which Bar Profile Should I Choose" to view all profiles.
Step 4 - Select Grille Fasteners
We offer a variety of grille fasteners, including dual-lock adhesive, slide pins, and concealed clips (for premium grilles only). Alternatively, you can select “no fasteners” if you plan to use your own installation method. Make your selection on the order page.
See "Which Fastener Should I Choose" for information about all fastener types.
Step 5 - Select a Light Pattern
After you select your preferred grille type, locate and click the image of the pattern that you would like the grille to create in your window. Note that low profile and full surround patterns are limited due to material strength and shipping size restrictions.
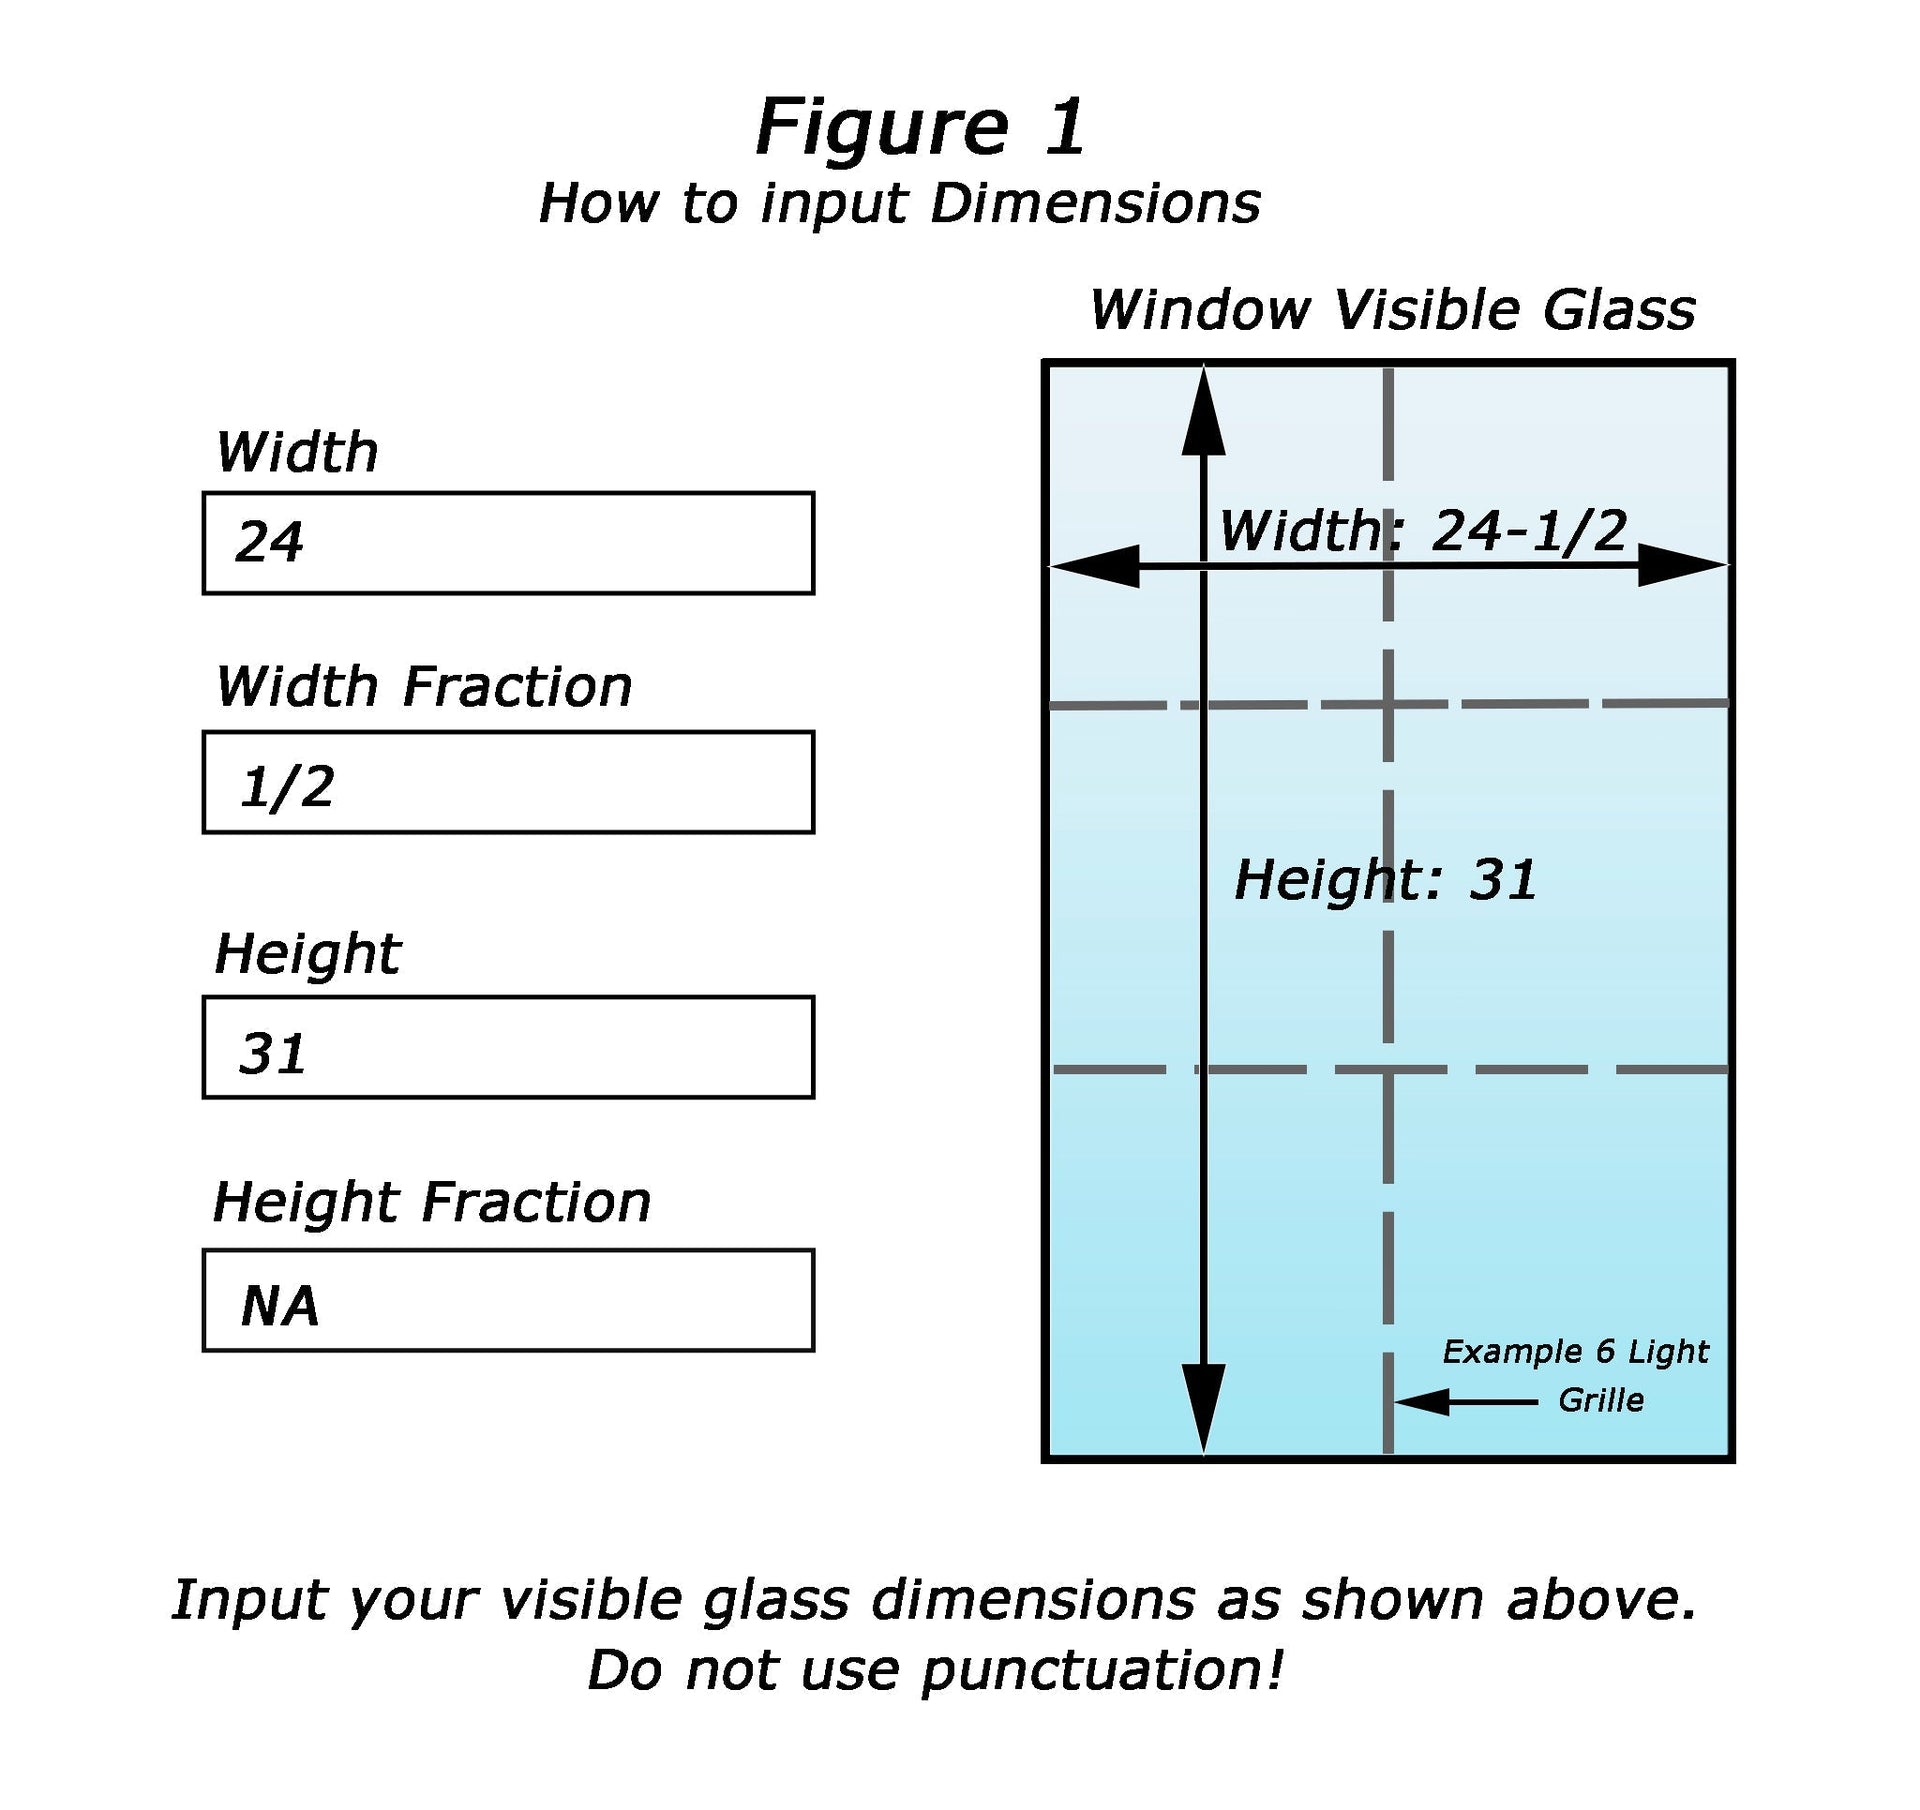
Step 6 - Input Dimensions
After you select your preferred light pattern, input your visible glass dimensions. Here is an example of how to properly fill in the fields to ensure a good fit.
Step 7 - Input Quantity
After you make your choices and input the dimensions, be sure to indicate the quantity you want and click “Add to Cart.” To order other patterns and sizes, follow the same seven-step process for each pattern or size. We suggest purchasing a sample grille first if you plan on installing a large number of grilles.
Step 8 - Check Out
Click “Check Out” when you have added all the sizes and patterns that you want to your cart. Then, you will be asked to provide the following information: name, email address, phone number, and shipping information. Payments can be made using PayPal and all major credit cards. And remember, we offer free shipping.
When you are ready to get started, simply click on your preferred grille type to begin.
- Premium Colonial Pattern (Non-Surround) (X1-Pine Profile Only)
- Colonial Pattern (Full & Non-Surround) (Standard & Low Profiles)
- Diamond Pattern (Full & Non-Surround) (Specific Standard Profiles)
- Top Row Pattern (Non-Surround) (Standard Profile Only)
- Radius Top (Non-Surround) (L-Pine Only)
- Sash Dividers (Non-Surround) (Standard, Low & Premium Profiles)