
How to Assemble Your Window Grille
Assembly Instructions
Once your non-surround grilles are delivered, you will need to put them together. We ship our grilles K.D. (Knocked Down), providing several benefits: unassembled grilles are more securely packaged and less prone to damage during transit, they occupy less space than a fully assembled grille, and they are shipped in smaller packages, contributing to our ability to maintain low prices.
Custom content
Make sure you assemble your grilles prior to painting or staining; otherwise, they may not fit together properly.
What to Do When Your Grilles Arrive
- Remove the grilles from the shipping container with care. Each grille is enclosed in a sealed poly bag.
- After confirming that you have received all the grilles in your order, proceed to open each bag individually to verify that all the bars required to create the light pattern of your specified window size are present. It's common to find additional bars in the bags; please store them safely as they may be needed to replace any damaged pieces in the future.
- Once you have confirmed that all materials are received and inspected, assemble the grilles before finishing. Note: It is not recommended to paint the grilles before assembly because paint can hinder the assembly and installation process.
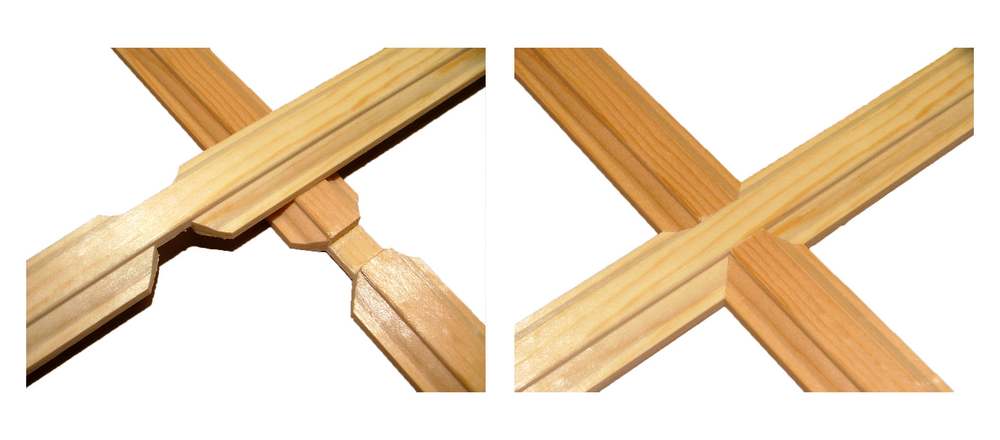
- Arrange the bars in the pattern that will be fitted into the window. Insert a small drop of wood glue into the channel of the bars that have the notch facing up, then position the corresponding cross piece into the channel and press gently until the bars are even at the top. (Refer to the picture above)
- Ensure the glue is fully dried before finishing and installing the grille into the window opening. Each grille comes with its own set of fasteners and instructions.
- Pine grilles should be finished with a quality paint or stain before installation. They are available to order either primed ready to accept paint or stain. You may also order them unfinished which allows you to select the finishing method that best matches your decor.